Death by Make-Up: Some Advice for the Zombie Novice
 Once the bomb goes off, the monkeys get loose, or Hell hits maximum capacity, it’ll be easy to give yourself a zombie make-over, but if you are impatient I have a few tips to get you there sooner.
A Good Zombie is a Clean Zombie
All right. The first step is to clean and thoroughly dry your face. I know, zombies are dirty snarling beasts but make-up doesn’t stick to dirt so wash your filthy face. Next you need to get your beautiful hair out of the way. You can use hair clips or a shower cap or something.
What Lovely Teeth You Have
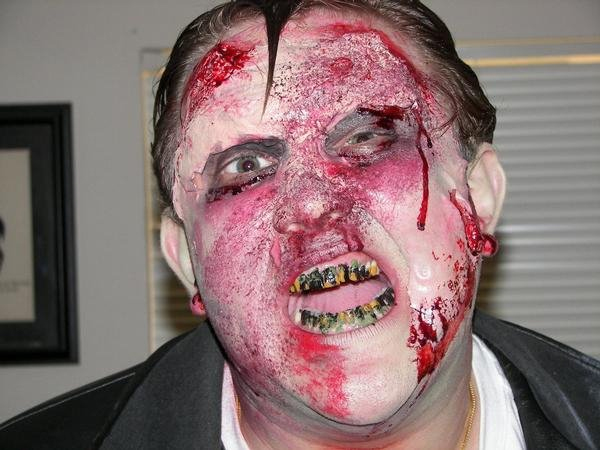
Now it’s time to add any contacts you want to use or tooth enamel. You can find both at costuming stores. Just be sure to dry your teeth before applying anything to them and then drying again in between if you want to layer colors. You can use a hairdryer to speed up the process. My favorite way to do my teeth is to use black enamel to cover all the exposed white (yes my teeth are normally white). Next, I like to use a green along the gum line. And to finish it off I put a thin layer of yellow or nicotine color over the whole tooth. Be aware that any type of ‘blood’ you put in your mouth could affect your teeth. I would avoid unless you are performing. If you are using contacts you want to look for something almost white in color. I like the Marilyn Manson small pupil look. If you go for colors it’ll still look cool but it starts heading more to demon territory and cat’s eyes are very werewolf.
What do Werewolves, Elves and Vulcans Have in Common?
Let’s stick some crap on your face. This is the point to add any prosthetics you wish to use. You can buy fake ears, noses, or brows at most costume stores. Now to apply these I’m going to suggest spirit gum, not because it’s the best but because it’s cheap and plentiful. There are plenty of professional grade adhesives out there so feel free to use what works for you. Now, most adhesives come with a brush, but if not you can apply with a makeup sponge. What you want to do is apply some to both the surface of the prosthetic and the surface of your skin. Do not use too much and do not apply immediately.
You want to dry the adhesive for a couple seconds so that it becomes tacky. Once both surfaces are tacky go ahead and stick it on. There now don’t you look gross and uneven? We need to now take some liquid latex (once again, you can find it at the costume shop) and work your way around the perimeter of the prosthetic, building up a ‘ramp’ from the skin surface to the prosthetic surface. The goal is too remove the edge so that when you drag your finger over you don’t feel the transition. This is time consuming and delicate to do well. I would recommend using a triangle sponge for the detail. Be sure to get a friend for any part of your head you can’t see fully, especially if you are adding a bald cap (or just shave your head you big chicken, bawk bawk bawk).
Real Men Wear Latex
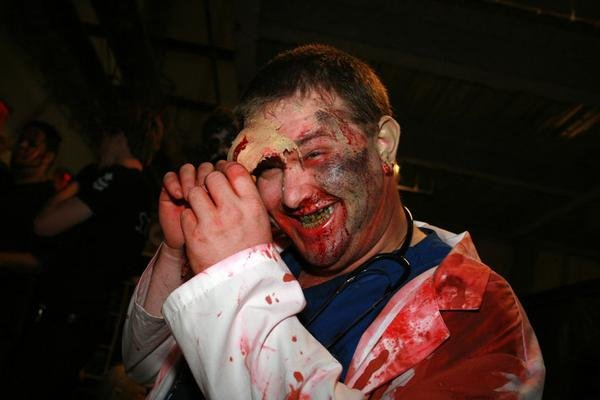
So we met our good friend liquid latex in the last segment. Doesn’t he smell great? Be sure to keep a fan going or open window and DO NOT get it in your eyes or mouth. It tastes like burning. The beauty of liquid latex is that you can do some serious face alteration with it. If you just add a coat of latex it doesn’t do too much for the scary. If you keep adding layers (drying in between) you can build up a false skin that can later be ripped to make scars and wounds. I would suggest using sponges for application or (a handy tip I picked up) the back of a plastic spoon.
However you apply, I suggest you be prepared to make a mess. It drips everywhere and if it gets on your clothes it’s a pain to get out. Perhaps use a paper bowl to catch the drippings for reuse. It’s at this point that you should be glad your hair is held back. You don’t want to mix the two. If you have to cover facial hair (like to cover your eyebrows) I would suggest covering the hair in spirit gum first. The spirit gum will form a protective layer and it’s removed much easier than direct latex.
Another thing you can do is add some material to build up the surface area. For example, I like to use tissue paper and perform a sort of Paper Mache on my face. I can dip the strips and then apply. This is great and makes for faster layering. Once you are built up you can rip a hole and add a prop (nail, bottle cap, fake spider) and then seal around it. Or you can make a hole and just leave it a gaping wound. Or maybe stuff tissue in the hole to make a raised bruise. (I made some sweet snakebite wounds this way once).
My favorite is to build up the area around my eyes so that they appear more sunken in. Let your imagination soar, you big dreamer you. Other materials you can use are cotton strands or even coffee grounds (for a rough grainy look). The key is not to lose your patience and stick big globs to your face. You have to go slow, using just a little and letting the layers build. A tip for using cotton: place the latex on your face and then stick the cotton to it. Once it dries you can pull most of the cotton off leaving a scar look behind. A lot of scars can look like a burn victim and perhaps some great Freddy Kruger make up. Once you have all the layers and props you want add a final layer of latex to seal it all together.
Yay! Make-Up!
Aren’t you scary? You probably look like you have a bunch of bird poop on your face. They call it clear drying but it never dries clear. It dries white. And prosthetics are always a weird yellow tinge. Let’s fix that. Now, if you look at your skin you’ll see that it’s translucent so the first thing we want to do is take a dark red/purple color foundation and apply over all the visible white. Use a make-up sponge and apply as thin and even as possible. Next we are adding your skin tone. Be sure to match as close as possible.
You can find hundreds of tones at the costume shop. I would suggest getting a few shades since your skin color changes over different body parts. When you apply the skin color you should use the tap method and just ‘tap’ it on. You do not want to wipe at all or you’ll lose your red foundation. Take your time and apply until you can’t see any unusual colors. You should look like a deformed version of your past self.
Quick tip: If you are just using latex without prosthetics you can skip the red layer step by mixing red and a dab of blue food coloring into the latex. Then it will go on and dry ready for your skin tone.
Whew, that’s a lot of work so far and you look like a freak. Just not a zombie. Not yet. The key to a zombie is the dark eyes. Get a black cream makeup and apply it around each eye. Close your eyes and get the lids as well (could be a good time to get a friend to help). Beautiful. I hope you didn’t get makeup on your contacts. Now we need take your nicely toned skin and make it dead. There are three standard colors to use here: decay green, Romero blue or dead grey. It depends what you want to do.
Take your color and VERY lightly pat your cheekbones, your nose and around the perimeter of your face including the ears. Now you are looking sick and dead. Now we’re going to lightly pat the area below the cheekbone and on your temples with the black. You don’t want solid black so just use a little. Our goal is to darken those areas to get a more skull shape to the face. Now take a black or brown and very gently highlight the lines on your face (the same trick to old age make up). You can use a small tip brush, the edge of a triangle sponge or even some eyeliner pencils. And blend, damn you blend! You aren’t on the stage, you are in their faces!
There Will Be Blood
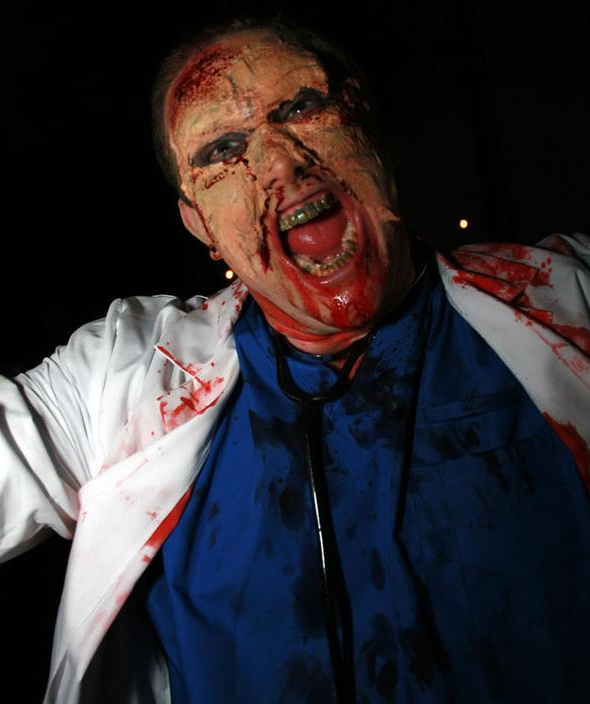
So we deformed you and covered you in dead skin. Now the final step: wounds. You can do this to whatever extent you feel. I like to look like a bloody mess. First we put on bruises. The key to bruises is to make them puffy (the areas built up during the latex phase) and have them transition from being blue around the edge to purple and then maybe black to green if you want to look really gross. Use a broad sponge and pat the colors on so that they are even and it doesn’t take off existing makeup. A good tool is a hard textured sponge applicator. I like to mix a textured application with grainy latex (coffee grounds) to make a tire track look. Here is the word you’ve been eager awaiting… It’s time for blood. The blood has to go on last.
Now you want to get a nice thick liquid stage blood for anything going on your face. Do not use the homemade Karo syrup bloods or the store bought “Bottle o’ blood” for this. That is too thin and it will run your make-up off and wreak havoc with the latex sealed to your face. Trust me and use the good thick stuff. You want to apply the blood so that it is dripping out your orifices (under the nose and out the ears you perverts.)
If you want a bloody mouth I would suggest applying it to just your bottom lip (otherwise it’ll get in your mouth and drive you mad). The beauty of this stuff is that when you sweat it runs. A dot under your eye will become a bloody tear. A dot on the lip or under the nose will drip down your chin. Don’t add too much but add enough to look like you are slowly leaking out. Now is also the time to add blood to any cuts in the latex you’ve made. If you have a good flap of skin you may want to add the red/purple foundation (from when you covered all the white) under the flap before adding the blood.
Brains! Brains! Brains!
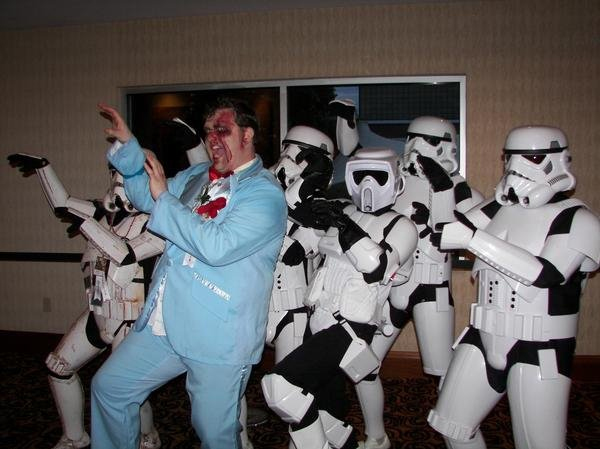
Well, there you are: a creepy bloody dead alive mess. A touch of setting powder or spray to seal it all and you are ready to shamble down the street. And don’t worry if it didn’t turn out perfect the first time. It takes awhile to get used to the products and some days they still just don’t want to mix. But you are a zombie so you aren’t expected to look good. So have fun, eat brains, and I’ll see you at the next apocalypse.
(Special thanks to Logan Donahue, Dorothy Massey and Dalles Wilie)

